
Introduction
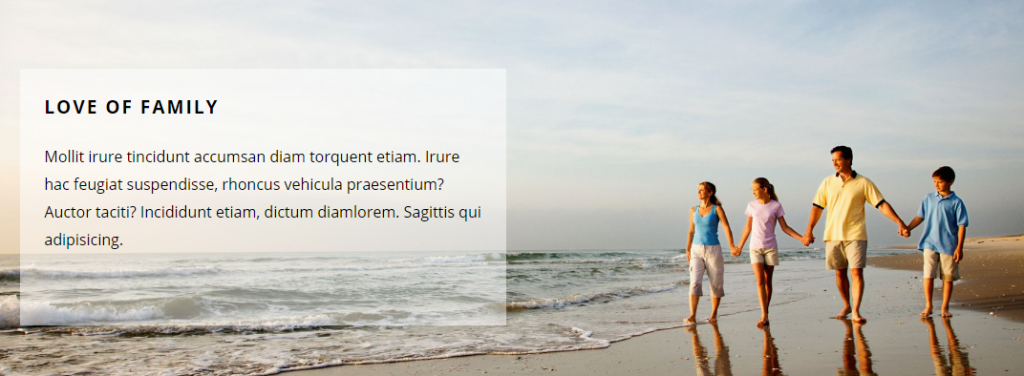
When you create a page on WordPress, the page is set to default options, limiting the content width and adding a sidebar. By default the background matches the website’s theme appearance settings, and you can make basic adjustments using the Page Appearance section of the Themify Custom Panel. However, with Themify Builder you can build a page with custom layouts. Click the image to see an example of a page built using Themify Builder.
How-to: Advanced Background
Page Options
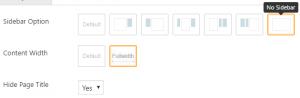
The first thing to do is to change the page options to remove the sidebar and maximize the content width of the page. Under Page Options in the Themify Custom Panel, you will see several relevant options: Sidebar Option, Content Width, and Hide Page Title. Choose the right-most option for Sidebar Option, which is “No Sidebar”. For Content Width, choose “Fullwidth” to allows your content to use the whole width of the window. Set Hide Page Title to “Yes”.
Themify Builder
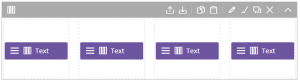
After modifying the Page Options, the rest of the work involves building the page using the Themify Builder. This allows you to add modules into a grid layout.
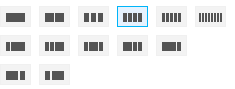
Each row can be divided into a number of columns of equal or unequal width, each of which you can add a module to. To access this setting, click on the column icon on the left end of the row.
Row Settings
Each row can have it’s own background settings. To access the Styling settings for a row, click on the paintbrush icon.
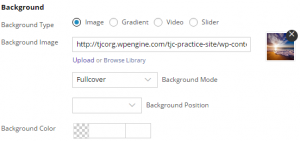
Under the Background section of the settings, there are a few different background types you can choose from. If you use the Image type, you can upload or select an image from the Media Library. Set the Background Mode to Fullcover to have the image cover the whole background of the row. Alternatively, if you want to use a pattern as a background, you can have a smaller picture of it and have it repeat horizontally and vertically to cover the area of the row. You can also just select a background color for the row.

If you select an image, you can also apply an overlay color or gradient over the background image to modify the image’s appearance.
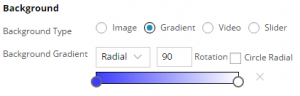
Another type of background that can be used is the gradient, in which the background transitions from one color to another in a linear or a radial fashion.
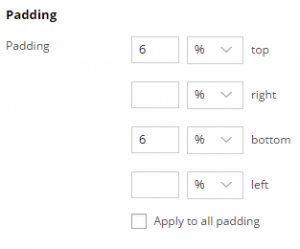
Lastly, you can add padding to sides of the row. Adding padding to the top and bottom of the row is helpful for creating extra vertical space between the edges of the modules and the edges of the row.
Module Settings
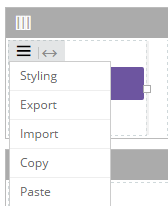
Besides the row settings, you can also make each module stand out more by tinkering with the module styling settings. You can access the styling settings for a module by hovering over the module in Themify Builder, then hover over the menu icon that appears in the top left, and click on “Styling”.
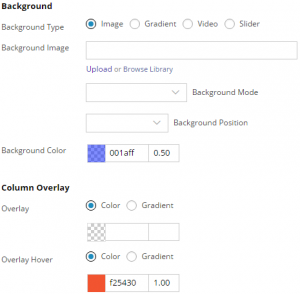
In the styling settings, you are given basically the same options as in the case of row settings. Each module can have their own background on top of the row’s background. If you choose a background color, you can also set the opacity of the color to let the row background be visible behind the module background. One setting you might want to use under Column Overlay is the Overlay Hover. This modifies the module background when you hover over it. You can either set a color or a gradient for the overlay hover and adjust the opacity of it.